連絡先、カレンダー、メール、タスクをエクスポートまたはバックアップ
備考: 以下の手順は参考情報です。GoDaddy ナビゲーターは、データのエクスポートについてはサポートを提供できません。
Outlook のバックアップファイルを作成して、メールのメッセージ、連絡先、カレンダーの情報、タスクを保存およびエクスポートできます。それから、新たなメールプランやメールサービス、Outlook の新バージョンにバックアップをインポートできます。このエクスポートには、フォルダのプロパティ (閲覧、権限、AutoArchive 設定) やメッセージルール、ブロックされた送信者リストといったメタデータは含まれません。Microsoft では、2016 より前のバージョンの Outlook のサポートを終了しました。
必須: メールボックス全体がエクスポートされるようにするには、Exchange キャッシュモードをオフにしてください。そうしないと、エクスポートには過去 12 か月のものしか含まれなくなります。
使用しているメールプラットフォームに基づいて適切なタブを選択します。
- Outlook on the webにサインイン。Microsoft 365メールアドレスおよびパスワードを用いてください(GoDaddy ユーザー名とパスワードはここでは使えません)。
- ページの一番左側で、
 「連絡先」を選択します。
 - 「管理」、「連絡先をエクスポート」の順に選択します。
- すべての連絡先をエクスポートするか、特定のフォルダの連絡先をエクスポートするかを選択して、「エクスポート」を選びます。
連絡先は、他のメールアプリ (Gmail など) や Outlook の別バージョンにインポートできる .csv ファイルで保存されます。
- Outlookを開きます。
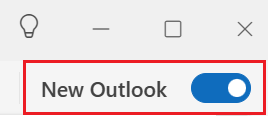
- 新しい Outlook を使用している場合は、従来の Outlook に戻してください。右上隅にある「新しい Outlook」トグルをオフにします。本当に元に戻すか確認される場合があります。

- 左上のファイル選択してください。
- 「開く/エクスポート」、「インポート/エクスポート」の順に選択します。
- 「ファイルにエクスポート」、そして「次へ」を選択します。
- 「Outlook データファイル (.pst)」、そして「次へ」の順に選択します。
- メールボックス全体をエクスポートするには、メールアカウントの名前を選択してから次の手順に進みます。カレンダー、連絡先、またはタスクのみをエクスポートする場合は、エクスポートするフォルダを選択してください。一度に 1 つの種類しかエクスポートできないため、連絡先、カレンダー、タスクを個別にエクスポートするのに、上記の手順を繰り返す必要があります。
- 「サブフォルダを含む」の隣にあるチェックボックスが選択されていることを確認してから、「次へ」を選択します。
- 「参照」を選択し、Outlook データファイル (.pst) の保存先を選びます。ファイル名を入力してから、「OK」を選択します。
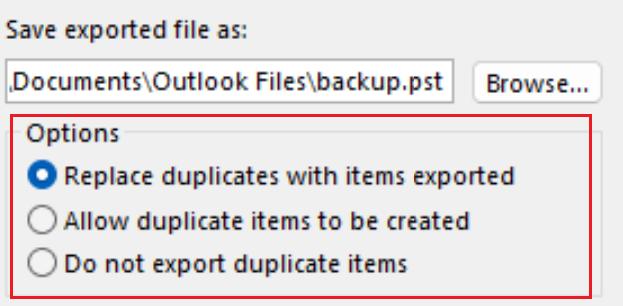
- 既存の Outlook データファイル (.pst) にエクスポートする場合、オプションで、既にファイル内に存在するアイテムのエクスポートについて設定してください。

- 「完了」を選択します。
- 次のシナリオのいずれかに該当しない限り、エクスポートはすぐに開始されます。
- 「Outlook データファイルを作成」ダイアログが開いたら、「パスワード」と「確認用パスワード」の欄にパスワードを入力して、「OK」を選択してください。それ以外の場合、パスワードを設定せずに続行するには、パスワードフィールドを空白のままにして、「OK」を選択します。
- パスワード保護されている既存の Outlook データファイル (.pst) にエクスポートする場合は、「Outlook データファイルのパスワード」ダイアログでパスワードを入力し、「OK」を選択してください。
- Outlookを開きます。
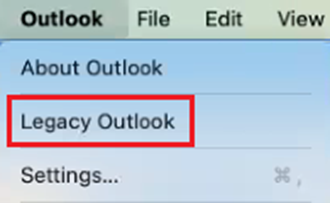
- 新しいバージョンの Outlook を使用している場合は、従来のバージョンの Outlook に戻してください。「Outlook」を選択し、それから「Legacy Outlook」を選択します。本当に元に戻すか確認される場合があります。

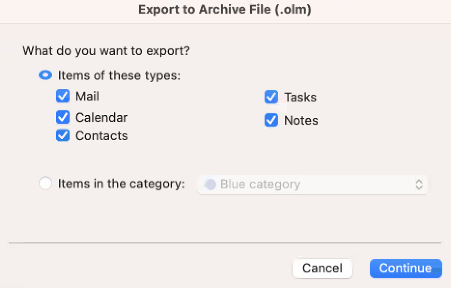
- 「ファイル」、「エクスポート」の順に選択します。「アーカイブファイルにエクスポート (.olm)」ウィンドウが開きます。
- 「エクスポート」が見当たらない場合、代わりに「ツール」、「エクスポート」の順に選択してください。
- エクスポートする対象を選択します。デフォルトでは、すべてのアイテムが選択されています。
- これらのタイプを個別にエクスポートするには、各アイテムの横にあるチェックボックスを選択します。

- [続行]を選択します。
- コンピューター上でファイルを保存する場所を選択し、ファイル名を入力し、「保存」を選択します。アイテムがエクスポートされます。
- 「完了」を選択します。
関連する手順
- これで Outlook データがバックアップファイルにエクスポートされたので、Outlook にインポートします。
その他の情報
- Microsoft のカレンダーを .ics ファイルにエクスポートする方法を確認してください。
- 詳細は、Microsoftが提供するOutlookでのファイルのエクスポート・インポートをご覧ください。
- Mac の Apple Mail でメールボックスをインポート/エクスポートする方法については、Apple が提供しているこちらの記事をお読みください。