Webサイトで使用するチャットウィジェットを作成する
チャットボットは、顧客が不在の場合でも24時間体制のサポートを顧客に提供し、顧客と関わりの機会を逃さないようにします。
If you have a GoDaddy Websites + Marketing site, you already have a chat widget built into your site, which you can customize to suit your needs. For additional websites, both Websites + Marketing customers and Conversations standalone customers can generate an HTML script chat widget to add to any website that supports custom code.
- Webブラウザで、GoDaddyの商品ページのに移動します。
スタンドアロンバージョンのConversationsを使用している場合は、 [Conversations統合受信トレイ]を展開します。 Conversationsプランの右側にあるWeb受信箱を選択してください。
または
Websites + Marketingプランをご利用の場合は、 Websites + Marketingまでスクロールして、サイトの横にある「管理」を選択します。左側のメニューで[Conversations]を展開します。
- 「設定」を選択してください。
- Select Channels.
- [Webサイトチャット]を選択します。
- Select Add another. (If you have a Websites + Marketing plan, you'll also see your built-in chat widget here, which you can simply customize if needed.)
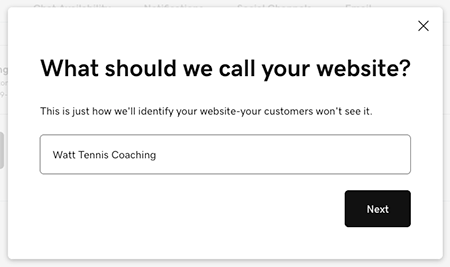
- チャットウィジェットに名前を付けて、 「次へ」を選択します。この名前は顧客には表示されませんが、ウィジェットの識別に使用するため、Webサイトにちなんで名前を付けることをお勧めします。
- チャットメッセージの送信先メールアドレスを選択します。これはチャットのバックアップとして機能し、オンラインでないときでもチャットウィジェットの外で会話を続けることができます。注:有料のWebsites + Marketingプランをお持ちの場合は、お客様サポート用のメールアドレスが作成されます。これをGoDaddyのMicrosoft 365メールアドレスまたは接続しているGmailアドレスに置き換えてください。ここで新しいメールアドレスを作成することもできます。
- Select Next. Your chat widget will appear under Web Chat. Select the widget to preview it.
- You can then customize your chat widget.
- 新しいチャットウィジェットを使用するには、 HTMLコードブロックの下の「コードをコピー」を選択し、Webサイトに貼り付けます。