Webサイトのアクションボタンを編集する
アクションボタンを使用すると、顧客はあなたと連絡を取ったり、 予約したり、任意のページのセクションに直接移動したりできます。アクションボタンを使用して注目の製品カテゴリを設定することもできます(注目の製品、新製品など)。
- GoDaddyの商品ページに移動します。
- 下にスクロールして「Websites + Marketing」を展開し、サイトの横にある「管理」を選択します。
- 「Webサイトの編集」を選択してWebサイトビルダーを開きます。
- アクションボタンのあるセクションに移動する、またはアクションボタンのあるセクションを追加します。
注意: 多くのセクションにはアクションボタンを含めることができますが、すべてではありません。「はじめに」または「コンテンツ」セクションは、アクションボタンを強調するのに役立ちます。
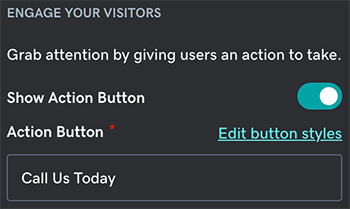
- セクション内の既存のアクションボタンを選択します。
- 右のパネルで、「アクションボタンを表示」の横にあるトグルをクリックし、オン(またはオフ)にします。
備考:
- ボタンが複数ある場合は、編集するボタンをまず選択します。
- そのセクションのすべてのボタンが無効になっている場合は、セクション内の任意の場所を選択し、右側のパネルで「支払うまたはアクションボタン」を選んで、非表示のボタンを表示します。
- ボタンのテキストを編集します。注意を引くためにはっきりと行動を示す言葉を使用し、可能であれば 25 文字以内に収めることをお勧めします。
- 訪問者をすべてのページ、URL、電話番号、メールアドレス、または商品(eコマースWebサイト用)に誘導することができます。「リンク先」ドロップダウンリストから、以下を選択できます:
- ページ:Webサイトの任意のページを選択します。訪問者を特定のセクションに移動させることもできます。Webサイトのアクションボタンを選択すると、新しいページに移動します。
- Webサイト URL:Webサイト URLボックスに目的のURL(例:coolexample.com)を入力します。訪問者がWebサイトのアクションボタンを選択すると、新しいブラウザタブで目的の URL に移動します(Webサイトはブラウザで開いたままになります)。
- 電話:ドロップダウンリストから市外局番を選択し、テキストボックスにあなたの電話番号を入力します。訪問者がモバイル端末からWebサイトのアクションボタンを選択すると、通話アプリがあなたの番号で開き、電話をかけることができます。
- メール:受信者としてお客様のメールアドレスがあらかじめ入力されており、必要に応じて件名とメッセージを追加できます。訪問者がWebサイトのアクションボタンを選択すると、デフォルトのメールクライアントを開いて新しいメールメッセージを作成するように求められます。あなたのメールアドレスは受信者として事前に入力されます。
注意: 特定のブラウザのアドオンや設定によっては、このアクションがブロックされる可能性があります。
- 商品: 商品を追加したeコマースサイトをお持ちの場合、「カテゴリー」のドロップダウンリストを使用して、訪問者を指定の商品カテゴリーに誘導することができます。
- 変更は自動的に保存されます。結果を見るには「プレビュー」を使用し、変更を公開する準備ができたら、サイトの公開を行いましょう。
詳細
- アクションボタンの外観を変更する
- テキストをカスタマイズしてリンクを作成します。
- 写真を Web ページにリンク