Microsoft 365 メールを Apple Mail (Mac) に追加する
Microsoft 365アカウントのセットアップ手順のステップ3です。
Microsoft 365 メールを Apple Mail アプリに追加します。そうすれば、お使いの Mac でビジネスメールの送受信ができるようになります。
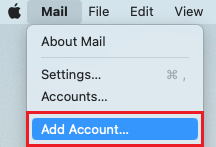
- Apple Mail を開きます。

- 新規ユーザーの場合は、ステップ 3 にスキップします。それ以外の場合は、「メール」、「アカウントを追加」の順に選択します。
- 「Exchange」、「続ける」の順に選択します。

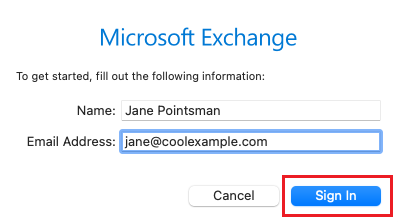
- 名前とメールアドレスを入力し、「サインイン」を選択します。
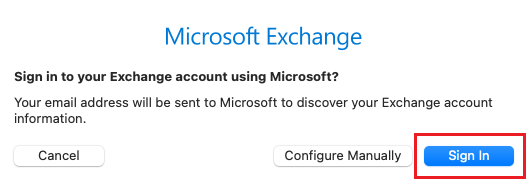
- 「サインイン」を選択します。
- Enter your email password, and then select Sign In.
- If you see a prompt that says your email is used with more than one account with Microsoft, select Work or school account (not Personal account).
- Enter your email password, and then select Sign In.
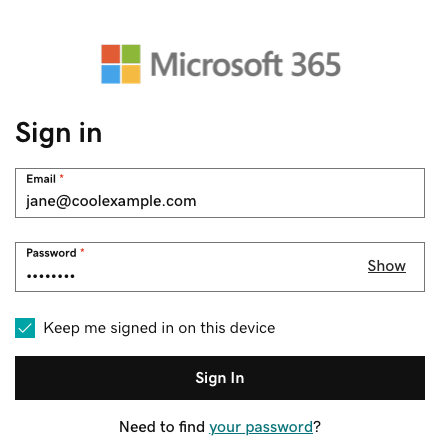
- If you're signing in from a new device or location, you'll see a prompt to Verify it's you and confirm your identity through a one-time code.
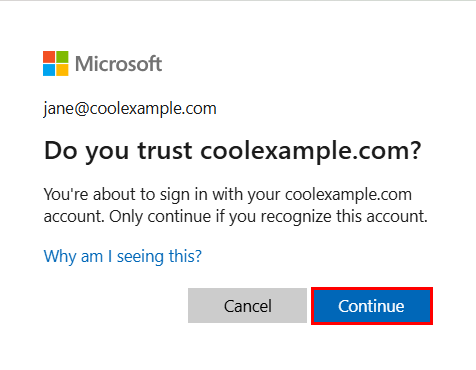
- If you're asked to trust your domain, select Continue.
- If it's your first time signing in and multi-factor authentication (MFA) is enabled, you'll see a prompt to set up your authentication method. (If you have trouble following the on-screen instructions, trying setting up MFA using these steps instead.) If you already have MFA set up, verify your identity using your authentication method.
- アカウントへのアクセス許可をリクエストされた場合は、「承諾」を選択します。
- 管理者が多要素認証(MFA)を有効にしている場合、アカウントの認証を行うか、認証アプリをセットアップします。
- アカウントへのアクセス許可をリクエストされた場合は、「承諾」を選択します。
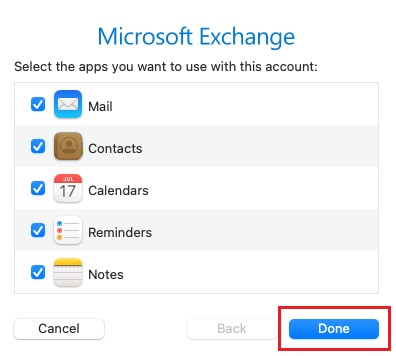
- 「完了」を選びます。設定はいつでも編集できます。